Easy Crochet Heart Keychain: Free Step-by-Step Pattern
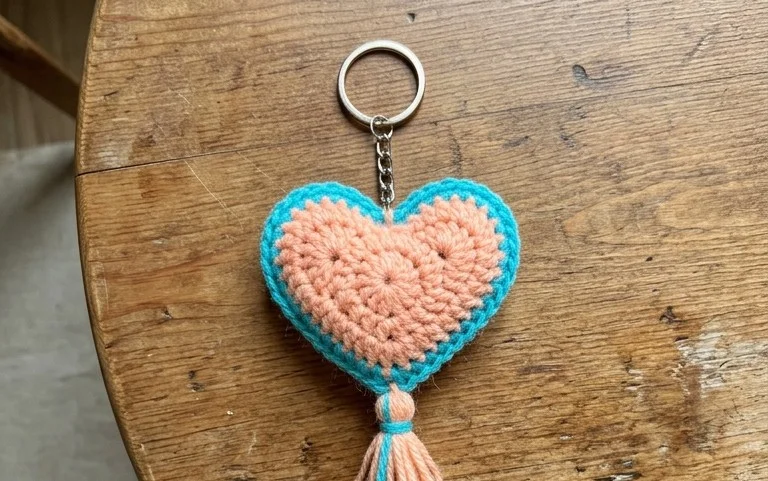
These small plush hearts feel firm in your hand and fit comfortably in any bag pocket. Creating a tiny stuffed accessory serves as a quick way to practice shaping rounds while working with simple increases and decreases. Beginners find this project rewarding because it uses minimal materials and results in a functional finished item in under an hour. You will learn how to maintain consistent tension to ensure the stuffing stays hidden inside the stitches. This project acts as a reliable starting point for anyone wanting to build confidence with basic 3D crochet shapes without committing to a large garment.
Why You’ll Love This Pattern
The Classic Crochet Granny Square is the foundation of countless heritage-style blankets and modern garments alike. This specific pattern focuses on a traditional three-round square that features clean clusters and sharp corners, making it ideal for joining later. Because each square works up in mere minutes, it serves as a portable project you can easily carry in a project bag for on-the-go crafting. You only need a small amount of yarn for each square, which helps clear out those leftover skeins from larger stash projects. Once you memorize the placement of the clusters and the chain-two corner spaces, the rhythm becomes meditative and requires very little focus.
I managed to whip up a stack of these in a single weekend while watching TV, and they joined together perfectly for a baby blanket. The corners are nice and square, not rounded like some other patterns I have tried.
— Sarah, hobbyist crocheter
Pattern Overview & Skill Level
- Skill Level: Beginner
- Approximate Time: 15–20 minutes per square
- Construction: Worked in rounds starting from a center ring
- Finished Dimensions: Approximately 4 inches square using worsted weight yarn
Materials & Supplies Needed
- Yarn: Worsted weight (#4) acrylic or wool blend, approximately 15 yards per square.
- Hook Size: 5.0 mm (US H-8).
- Notions: Tapestry needle for weaving in ends, scissors, and optional stitch markers to hold corners if joining multiple pieces.
- Safe Yarn Substitutions: Cotton yarn will result in a firmer, less drapey square and may require a slightly smaller hook to maintain tension. Wool provides natural elasticity, while acrylic is ideal for washability in blankets.
Stitch Guide & Abbreviations (US Terms)
- ch = chain
- sl st = slip stitch
- dc = double crochet
- dc cluster = 3 double crochet stitches worked into the same space
- sp = space
- MR = magic ring (or ch 4 and sl st to join into a ring)
- st = stitch
Step-by-Step Pattern Instructions
Granny Square Body
- Rnd 1: Start with a MR. Ch 3 (counts as first dc), work 2 dc into the ring, ch 2. *Work 3 dc into the ring, ch 2; repeat from * two more times. Join with a sl st to the top of the beginning ch-3. (12 dc, 4 ch-2 sps)
- Rnd 2: Sl st into the next dc and into the first ch-2 corner sp. Ch 3, 2 dc, ch 2, 3 dc all in the same corner sp. *Ch 1, skip 3 dc, (3 dc, ch 2, 3 dc) in the next ch-2 corner sp; repeat from * two more times. Ch 1, sl st to the top of the beginning ch-3. (24 dc, 4 ch-2 sps, 4 ch-1 sps)
- Rnd 3: Sl st into the next 2 dc and into the next ch-2 corner sp. Ch 3, 2 dc, ch 2, 3 dc in the same corner sp. *Ch 1, 3 dc in the next ch-1 sp, ch 1, (3 dc, ch 2, 3 dc) in the next corner sp; repeat from * two more times. Ch 1, 3 dc in the final ch-1 sp, ch 1, sl st to the top of the beginning ch-3. (36 dc, 4 ch-2 sps, 8 ch-1 sps)
Finishing
Fasten off your yarn, leaving a 6-inch tail. Use a tapestry needle to weave the yarn tail through the back loops of the final round to secure it. Repeat this for the center ring tail. If you intend to join these squares, you may leave longer tails to use for sewing the pieces together.
Care & Washing Instructions
- Hand wash or machine wash on a delicate cycle using cool water and mild detergent.
- Lay the squares flat on a towel to air dry, reshaping them gently while damp to ensure the corners remain sharp.
- Avoid wringing or twisting the fabric, as this can stretch the stitches and distort the square shape.
Pro Tips & Common Mistakes to Avoid
- Maintain consistent tension by ensuring your yarn feed is smooth; if your corners look wavy, your tension might be too loose in the chain spaces.
- Place a stitch marker in the first ch-2 corner space of each round to make finding your joining point much easier.
- Weave in your ends as you go, or at least every few squares, to prevent a mountain of finishing work at the end of your project.
- You can easily adjust the size of the square by adding more rounds in the same pattern (always adding 3 dc in each side space and the corner cluster), but note that larger squares will require significantly more yarn per unit.
Frequently Asked Questions
Can I use a different weight of yarn for this pattern?
Yes, you can use any yarn weight, but you must adjust your hook size to match the yarn manufacturer’s recommendation. A thinner yarn will result in a smaller square, while a thicker yarn will create a larger one.
Why are my squares curling up instead of lying flat?
Curling usually happens if your tension is too tight or if you are missing the ch-1 spaces between clusters. Ensure you are working into the corner spaces and not skipping them.
Is this pattern suitable for someone who has never held a hook?
This is a classic beginner pattern, though you should be comfortable with the basic double crochet stitch and slip knot before starting. Most beginners master this square within a few practice attempts.
Am I allowed to sell items made from this pattern?
You are welcome to sell finished items created with this pattern. Please credit the original design and use your own photographs when listing your items for sale.
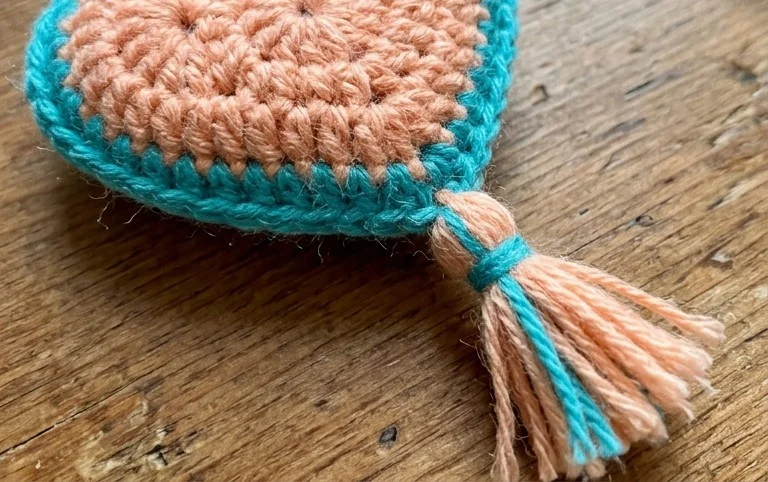
A completed heart accessory adds a handmade touch to your house keys or a backpack zipper. You can experiment with velvet yarn for a softer texture or try metallic thread for a holiday gift that shimmers. Share your finished pieces on social media to inspire others in the crafting community. You can find more simple accessory patterns like this one by browsing the archives on the blog. Your effort shows in every stitch and makes these tiny items special additions to your collection of handmade goods.